


Making a Deer Antler Chandelier
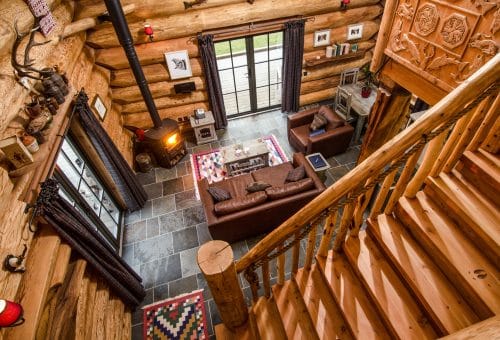
If you’ve ever stayed with us at Eagle Brae, you’ll have noticed the stunning antler chandeliers that hang from the rafters of every log cabin. Eagle Brae Owner, Mike Spencer-Nairn, lovingly makes these chandeliers by hand using deer antlers, which male deer shed naturally each year. The whole process takes him about 60 hours, split into four equal sections of creating the structure, drilling and wiring, covering up and painting. Today, Mike shares his instructions on how to make an antler chandelier, so you too can create your very own!
Please note, this method requires knowledge and skills in electrical wiring. Please ask an electrician for help if you are not able and confident to do this yourself.
Choosing your antlers
To make a chandelier, with say 15 antlers in it, you will need a minimum of 50 antlers to work with. This is because every antler is different. Most antlers just wont be the right shape and size for any one position, so you need a good selection to choose from.
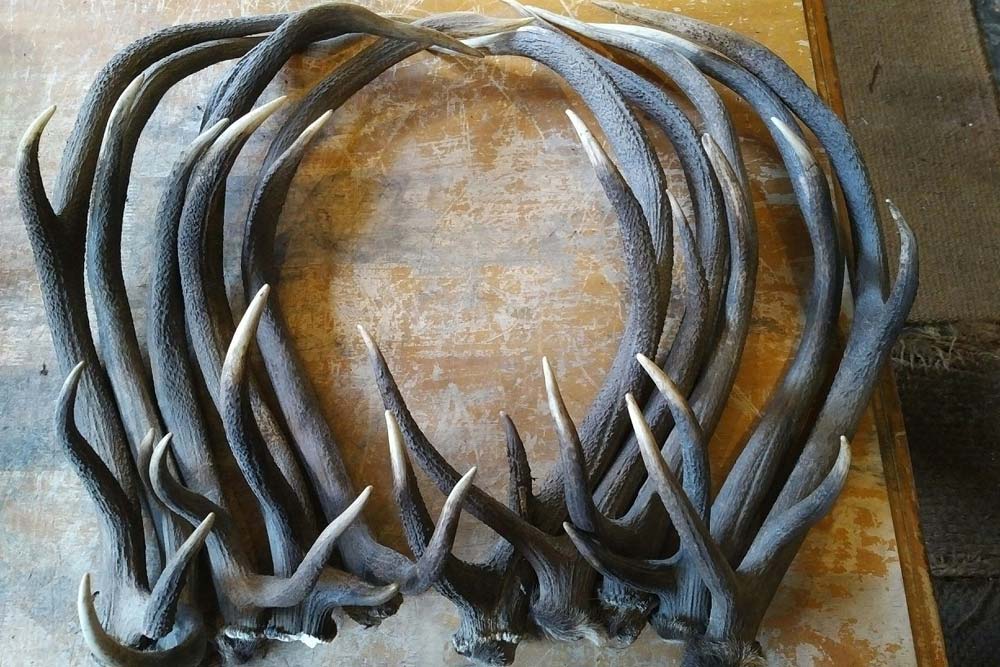
Collecting antlers is one option, but very time consuming. Also, it can annoy gamekeepers, as they are traditionally their property. The best bet is to buy them from an antler dealer. The other advantage of buying them is you can choose 50 antlers all of similar size and shape, which will make your life much easier when it comes to putting them together to make a chandelier. Make sure to buy 50/50 right and left hand antlers.
The Structure
The first thing to do is to make your structure. Start with the bottom round by laying all the antlers out flat on the work surface. You will need to pair up left hand and right antlers so that their tine points face into each other and touch. This is crucial as you will put a screw through every single point where one antler touches another. This is where the structure strength comes from.
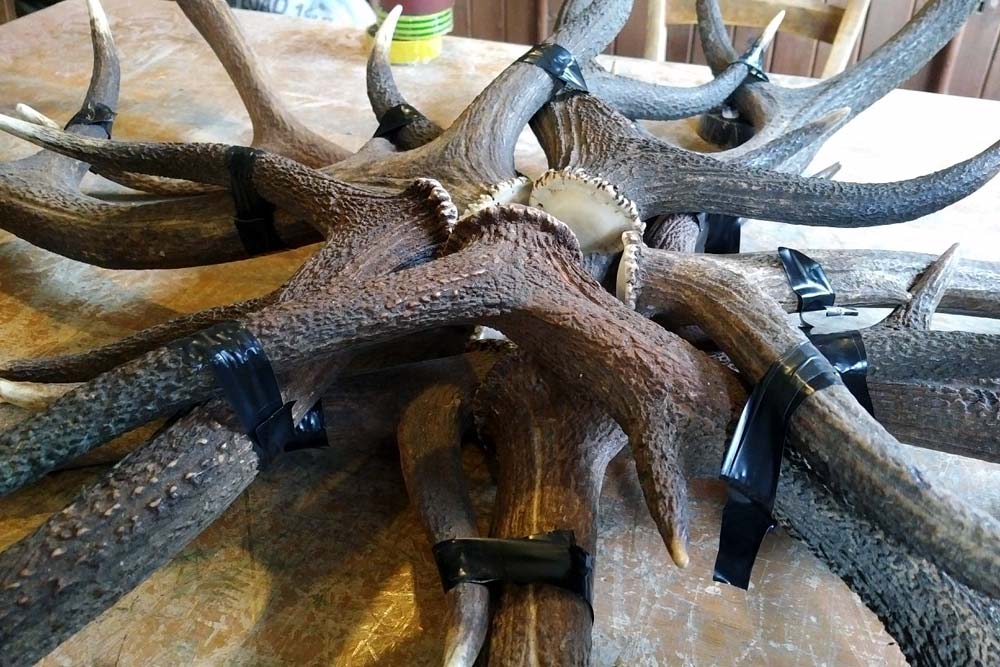
To begin with, tape all antlers together with electrical tape. It’s perfect for the job, as you can bind it tight and yet it still allows a little movement to juggle things around. Build the entire structure with electrical tape bindings first before you screw anything.
Screw it together
Once you are happy with taped structure, it’s time to screw it all together. One very important thing to remember is that you will have to wire this chandelier after screwing it. The only place wires can jump antler to antler is the same places you are screwing the antlers together, so don’t block your wiring routes with the screws. Place screws strategically to keep a route open for the wiring channels.
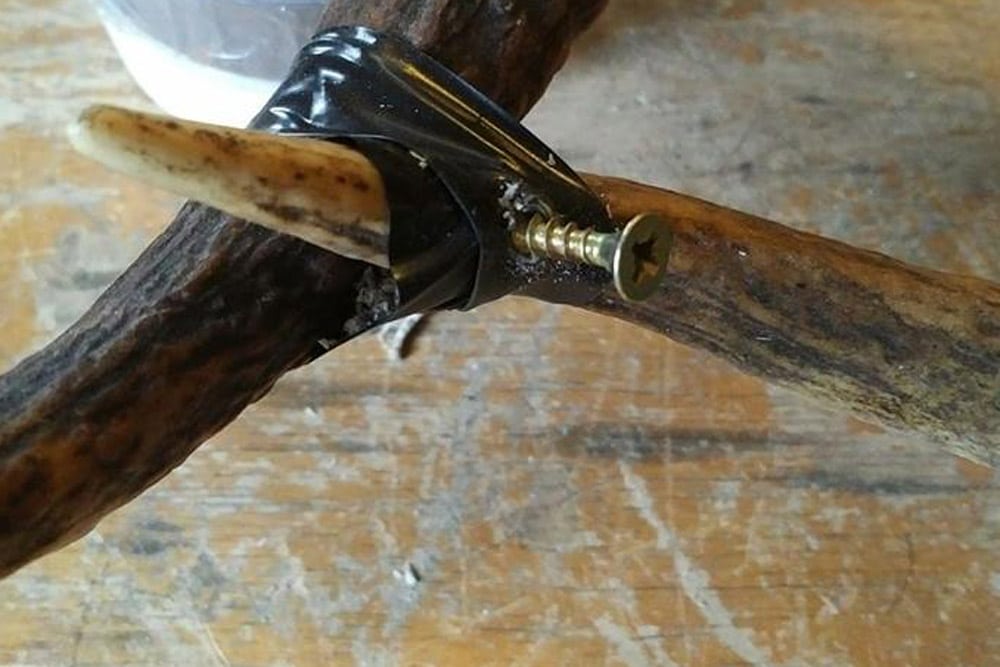
To screw the antler together, use a Dremmel tool or similar with a conical sanding fitting on to make an initial hole in the hard surface. Then use a drill to make a hole about 0.5 mm smaller than your screw size. Put the screws right through, but don’t send the head right up to the antler surface. Leave the screws sticking out at both ends. You will cut them off later. Put the screws right through your electrical tape, there is no need to take the tape off first, you can remove it easily afterwards.
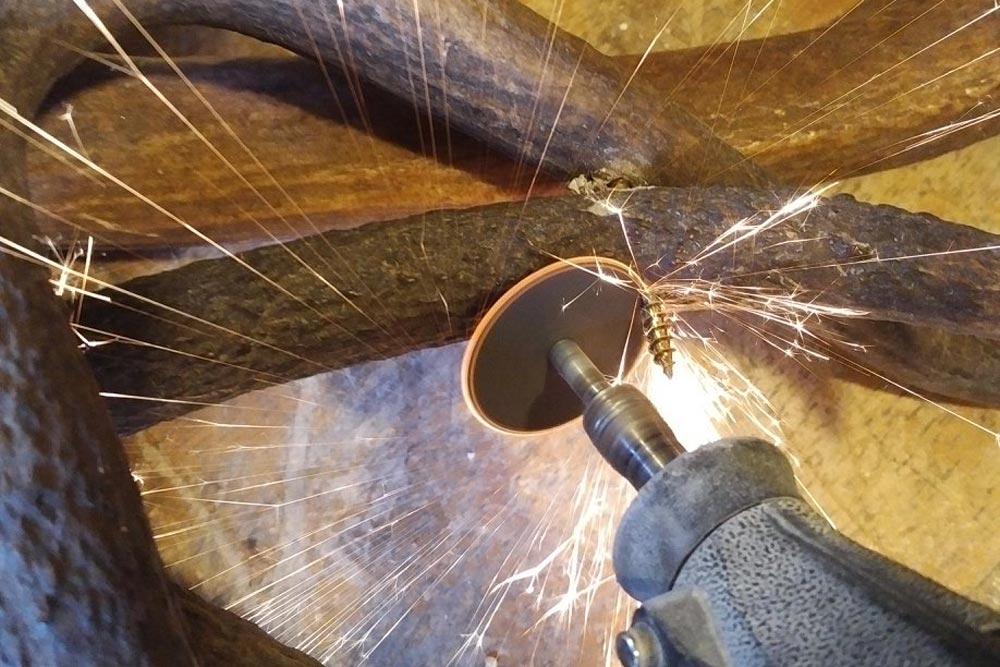
Cut off the screws
Using a Dremmel tool with a little grinder disk fitting, cut the screws heads and tails off at each end to be flush with the antler surface.
Drilling
Plan your route first. From where the wire will enter the chandelier at the top, right the way down and around to the last light. Use different colour electrical tape to mark your crossing points from one antler to the next, and to your light bulb positions. You will need special long drill bits, at least 30 cm long (preferably longer). As with the screw holes, make the initial start of the hole with a sanding tool, then drill. Try and drill through as far down the antler as you can, aiming for your next crossing point. Ensure you will exit the antler at a point where you can re-enter the antler. The idea is to drill back and forth diagonally along the antler until you get to antler crossing points and on until you reach a bulb site.
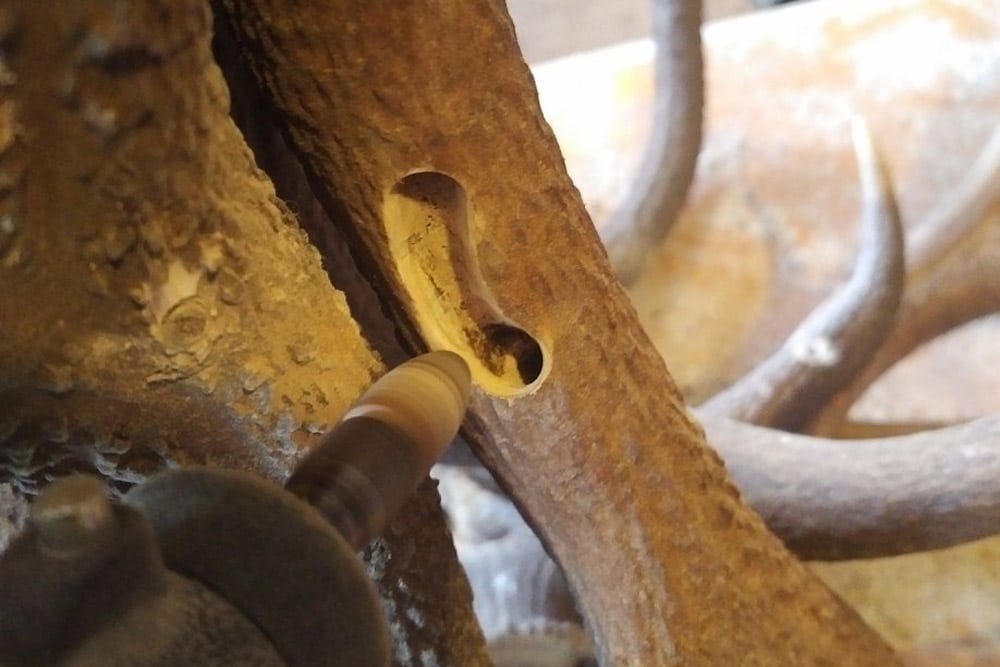
You will be using a dual core flex wire for the wiring. In some sections of the wiring channels, this will need to be double and in others single. Pre-plan this and drill a narrower hole for the single sections and a broader hole for the double sections. For example, only a single dual flex wire is required from the initial entry point down the upper antlers. However once you enter the antler that holds a bulb, you will need to take the wire to the bulb and back before crossing to the next antler. So this section needs double dual flex wire and will need to be drilled broader. Once you have drilled all the wiring channels, use the sanding tool to soften the edges of all openings. You will also have to drill the openings for the bulb holders.
Fix the bulb holders
Next, glue in the bulb holders with superglue.

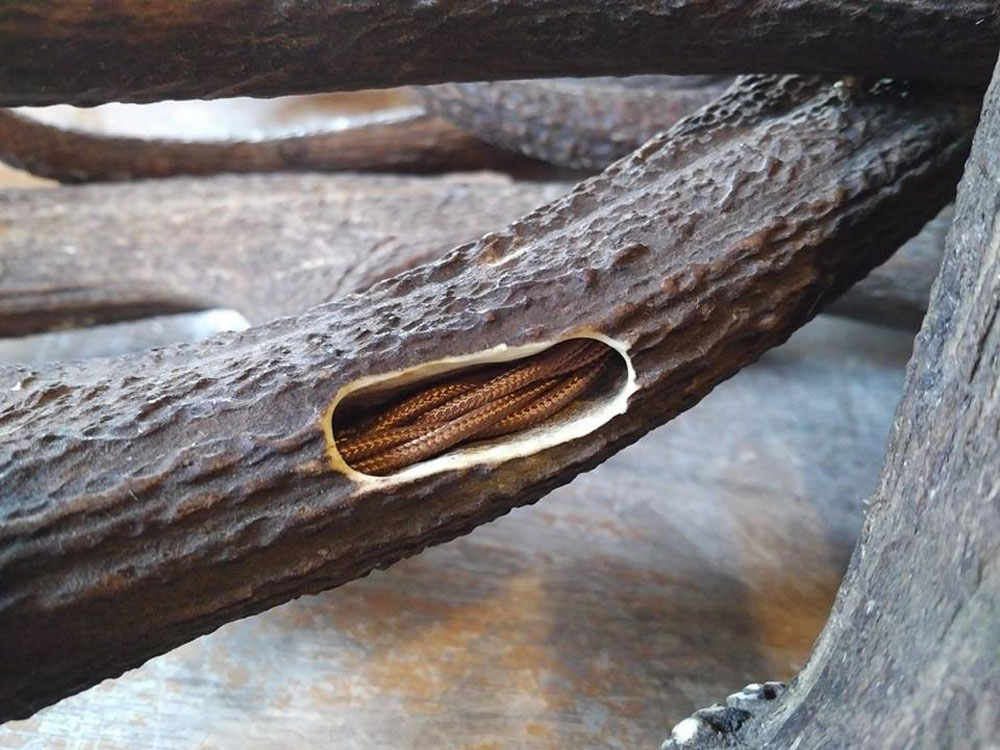
Wiring
Allow enough wire to travel from the ceiling rose down the chain and then to your first bulb. From then on just allow enough wire from bulb site to bulb site in separate lengths. To help get the wire through, connect the dual flex to some thin picture framing wire or similar and use that wire to pull your dual flex through the channels. The sections with double dual flex will need both to be pulled through together at the same time. Once you have finished wiring, tape the ends of the wires up at the bulb sites, leaving enough wire to work with to connect the wire to the bulb holders later on. If you want to test your wiring, you can do so at this stage by putting bulbs in and connecting the wires. Remember your wiring is in a series circle, so they will all need to be connected to test them all. Seek the help of an electrician if you are not 100% sure on the wiring.
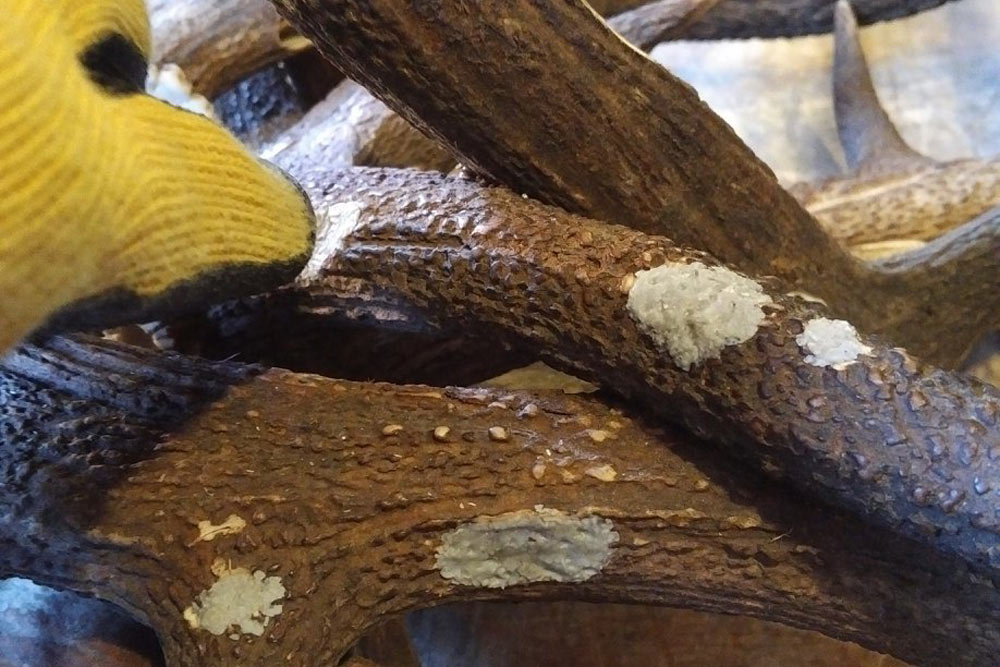
Covering up your tracks
The chandelier is now wired but looks terrible as there are holes everywhere. Take an taxidermist’s epoxy resin. It usually comes in A and B parts that become active when kneaded together. It’s a putty that remains soft and workable for about half an hour and then starts to harden. After 24 hours it will be as hard as the antler itself. Fill all the holes with the putty and texture the outside surface to look like the antler around it. If there are natural lines on the antler, then continue these across the putty. The correct texture goes a long way to completing the cover-up. Once complete allow to set for 24 hours. You will also want to put a little putty over all your screw entry and exit points, where you have cut the screw heads and tails off.
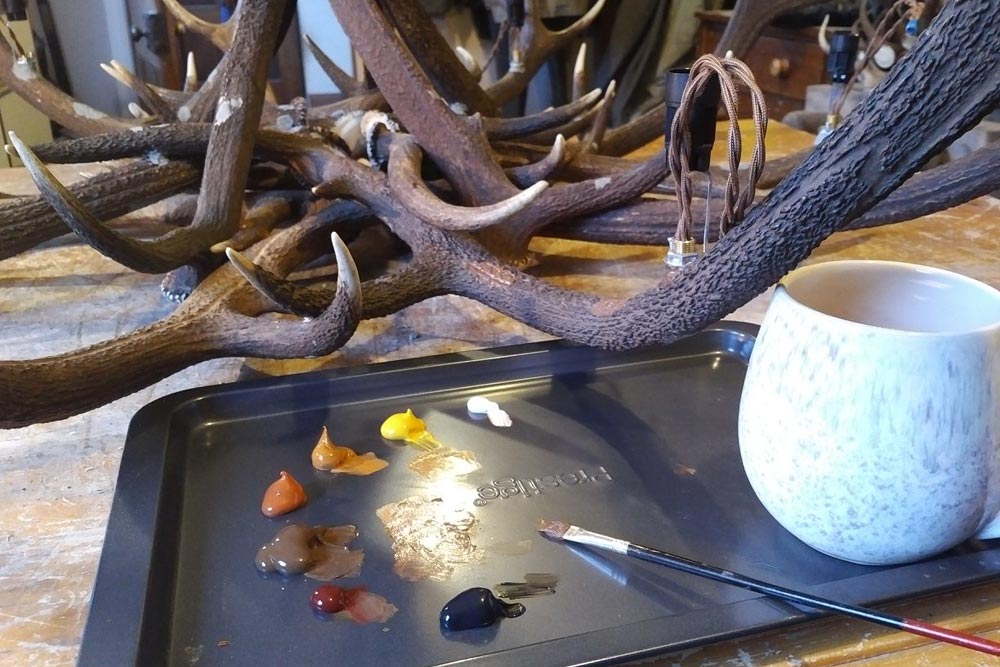
Painting
You now need to paint the putty sites. Buy acrylic paints in the brown, ochre, sienna, mustard, umber ranges, and of course black and white as well. You should be able to match any colour on the antler from these acrylic colours. Paint a base colour for each putty area first and then the detail on top in another colour. Carefully look and understand the colour scheme of the natural antler around your putty sites and try to reproduce it. A well painted putty site is impossible to see in the finished chandelier!
Fix the hook eye
At the top of the chandelier you will need to screw in a hook eye that will fix it to the chain it hangs from. The location of this hook eye is crucial to how your chandelier hangs. It must be at the absolute centre of the weight balance of the chandelier for it to hang level. To find the right spot, put screws into the chandelier at various places and pick it up from the screw head with pliers to see how the balance is. Once you find the spot, screw your hook eye in.
Connect the bulbs
Complete the wiring by connecting up the bulbs.
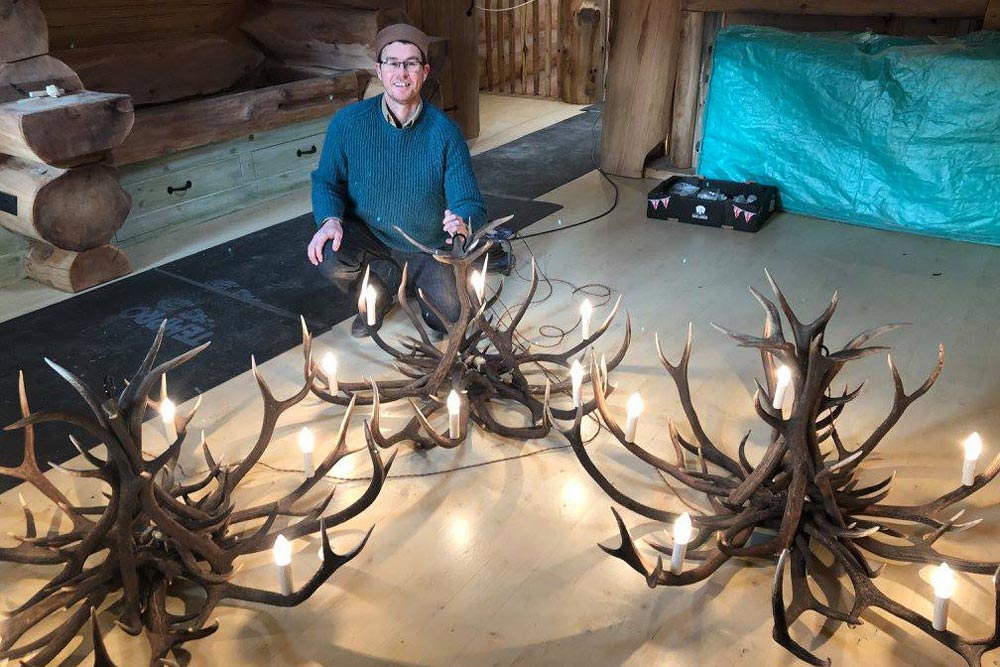
Hang the chandelier
Connect the hook eye to a chain, connect up the wiring and hang your chandelier! You must ensure you install a weight load certified safety cable just in case either the ceiling rose, chain or hook-eye ever fail for some reason. Independently connect this cable to the ceiling/rafter and run it down the side of the chain and through the antler structure so that it cant pull back through. We use cable and stop ends made by Gripple which are perfect for the job.
So now you know how make an antler chandelier, and how much time and effort goes into each one of our Eagle Brae masterpieces. You can view more photos of the process here on Facebook. Now it’s your turn to have a go!